All Treatment Rooms Guide
Once a patient passes the check-in checks, you assign them to a treatment room. Each room has its own mini-game, required items, and timing rules. Get any of them wrong and the patient dies — sometimes automatically. Here is how every room works.
Key rule: you can step away from Basic Medical, X-Ray, and Heart Monitor mid-task and return later. Surgery is the exception — once it begins, stay until it is done, or the patient dies.
Room 5 — Basic Medical
The standard treatment room and the one you will use most. Run the analysis on the patient, which tells you what to administer, then give them the correct items.
Tip: handle another task during the analysis to save time — you can leave the room and come back when the result is ready.
Room 6 — X-Ray
A memory mini-game. Squares flash in a sequence, and you must click them with M1 in the same order they flashed. A mistake restarts the sequence — it does not kill the patient. Once the sequence is complete, administer items as in Basic Medical.
- • Watch the full sequence before clicking.
- • Mistakes cost time, not lives — stay calm.
- • You can leave and return mid-game.
Room 7 — Heart Monitor
A precision mini-game. Click the white icons and avoid the skulls until you reach 100%. Hitting a skull lowers the heart percentage but does not kill the patient. Finish the machine steps, then administer items.
- • Prioritize accuracy over speed — skulls only set you back.
- • You can step away and return later.
Room 8 — Surgery (most dangerous)
Surgery is the only room that kills the patient if you leave. A timer starts the moment you interact with the patient, and you must finish on the spot. Follow the on-screen prompts and take items from the room, including Scissors and Scalpels.
Three-item prompts: when the game asks for three items at once, order does not matter — but a wrong item kills the patient. Double-check each one before you use it.
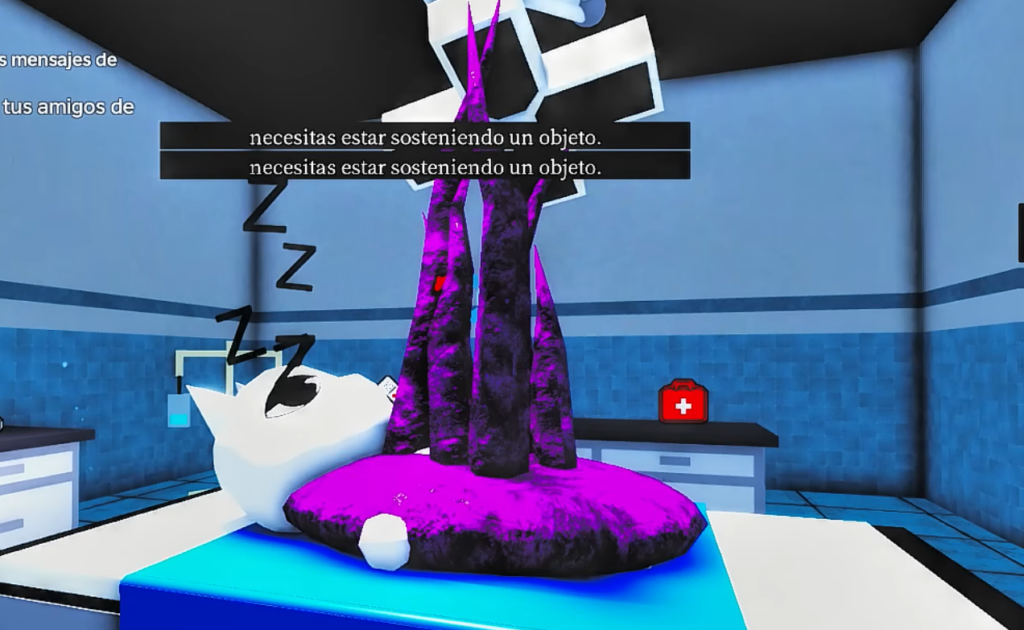
Surgery Tentacles also appear in this room during the mini-game. Never shoot or taze them — doing so kills the patient automatically. Avoid them and keep working. See the Surgery Tentacles entry for details.
Room navigation tips
- • A red line above a room number means a patient is inside.
- • Assign patients to the closest free room to minimize travel time.
- • In co-op, split rooms between players so surgery never waits on a busy teammate.